The Official Beginner's Guide To Trust Wallet
Introduction
What is Trust Wallet & what does it do?
Used by over 60 million people worldwide, Trust Wallet is an easy-to-use, multi-chain self-custody wallet that allows you to securely store and manage over 9 million crypto assets, including NFTs, across 70 blockchains.
Web3 and the importance of using a secure self-custody wallet
Web3 has emerged as one of the most prominent movements in the crypto space. While there is a lot of jargon associated with Web3, including blockchain, cryptocurrency, and non-fungible tokens (NFTs) - its far-reaching significance is in the power it gives users.
The world has evolved, and as humans, we spend much more time online. This has led to our lives becoming more interconnected digitally, with a lot of our identifying information sitting online.
However, with the current internet, we don’t have control and ownership of our data, with a lot of data being sold to the highest bidders for marketing purposes. This is what Web3 aims to change. But what exactly is Web3?
What is Web3?
Web3 is the next iteration of the internet that will utilize blockchains, cryptocurrencies, and non-fungible tokens to give users data ownership and self-sovereignty. Web3 has four core ideas:
- Decentralization - it operates without any central authority with ownership being distributed to its builders and users.
- Permissionless - everyone can participate in Web3, and no one is excluded.
- Trustless - it runs using economic mechanisms and incentives without the need for a third-party.
- Native payments - Web3 doesn’t rely on banks or other traditional financial institutions. Instead, transactions are carried out using cryptocurrencies such as Bitcoin that can be stored in a non-custodial wallet like Trust Wallet.
Simply put, Web3 is a new, improved, and better internet with an added social layer, digital identity and virtual money. Users using Web3 will also need to use a secure self-custody wallet.
What is self custody & why is it important?
Self-custody is when you, as a user, have true ownership over your digital assets or digital money.
A secure self-custody wallet gives users full responsibility for their private keys, thus safeguarding access because the keys are not stored or kept anywhere else. This is important because users will always have control over their digital money or assets.
And that’s where in Web3, non-custodial wallets such as Trust Wallet come in.
Trust Wallet’s mission is to build a seamless Web3 gateway and an open ecosystem that enables a secure and decentralized world. It offers multi-chain, self-custody, and Web3 access to its users to securely store, send and receive more than 9 million tokens, all while connecting to a myriad of decentralized applications (dApps).
What we’ll cover in this guide
In this official beginner’s guide to Trust Wallet, we will look at how you can get started on the Trust Wallet app, buy, receive, send, stake, swap, and store crypto, as well as connect to Web3 dApps.
In addition, we will also take you through what the Trust Wallet Token (TWT) is, the app’s safety and security, and last but not least, how to troubleshoot and get support while using your Trust Wallet app.
Getting Started
Downloading and installing Trust Wallet
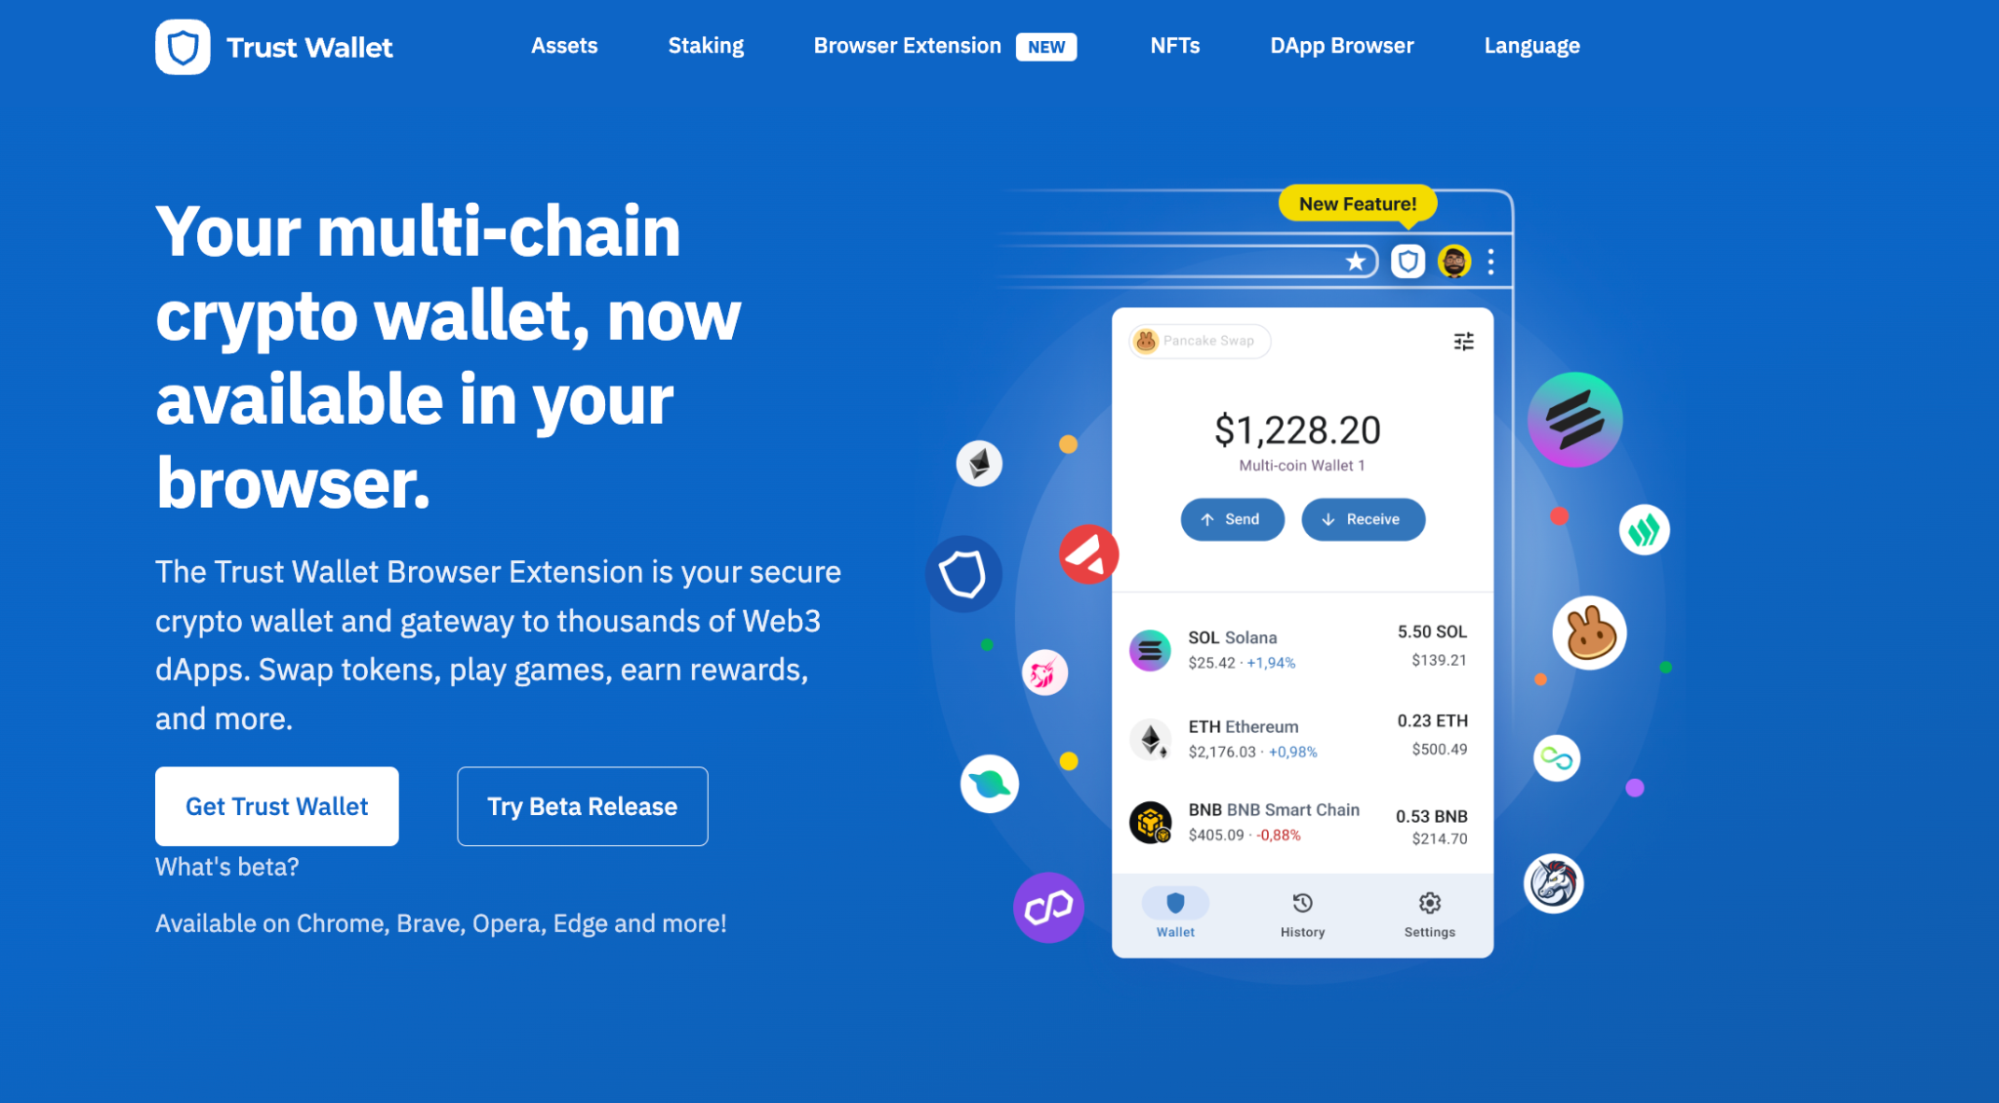
Accessing and downloading Trust Wallet is easy either as a mobile app on your Android or iOS device or as a browser extension. If you aren’t sure about the links, head to the Trust Wallet.com download page for links to the different options.
To download Trust Wallet as an app, head over to the Apple App Store or Play Store, search for Trust Wallet, and click on ‘Install’ or ‘Get’ button to download the app to your device.
In addition, you can also use Trust Wallet as a browser extension on Chrome, Brave, Opera, and Edge browsers. For this guide, we will use the Chrome browser as an example.
To install the extension go to: https://trustwallet.com/browser-extension and then click on the ‘Get Trust Wallet’ button.
Then click the ‘Add to…” button on the Chrome store.
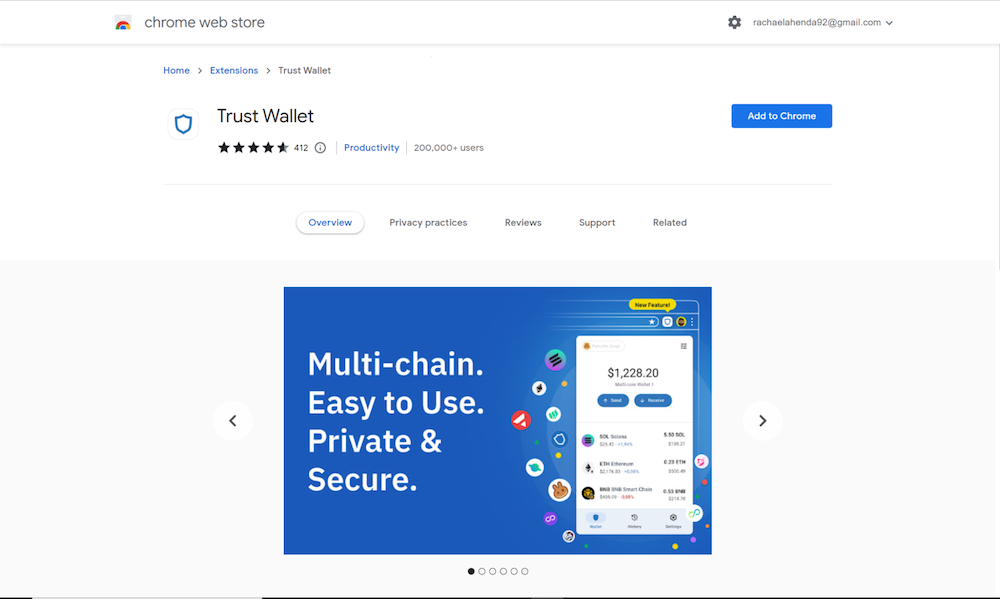
The Trust Wallet browser extension will then be active on your browser for you to use as you please.
Next, we look at how you can create and use Trust Wallet on your phone.
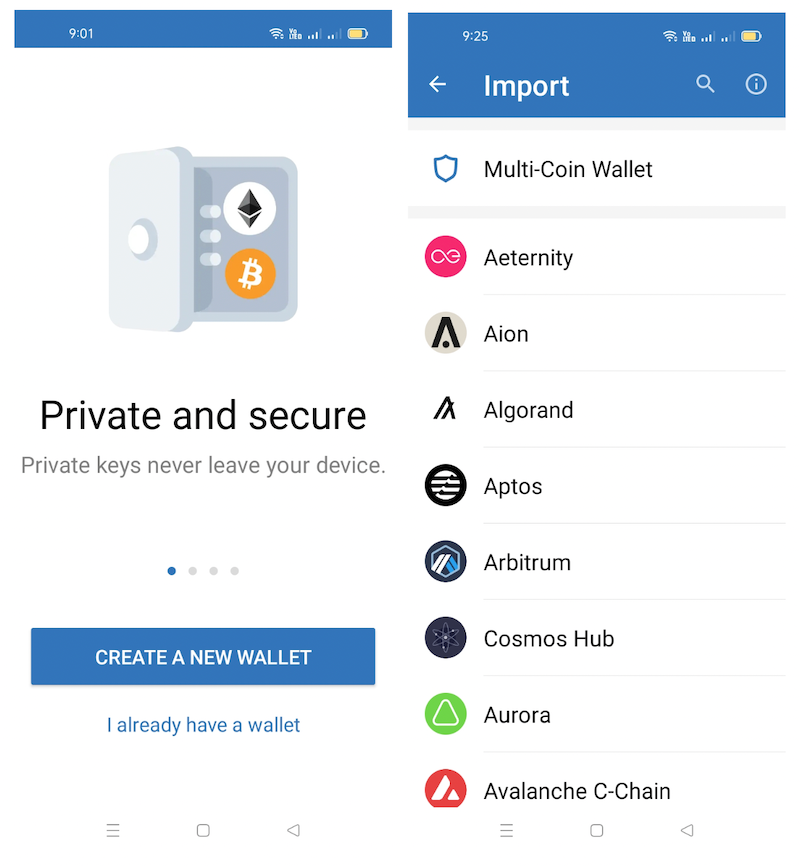
How to create a new wallet
Once you have successfully installed the app on your smartphone after downloading it from a relevant app store, open the app, and proceed to create a new wallet.
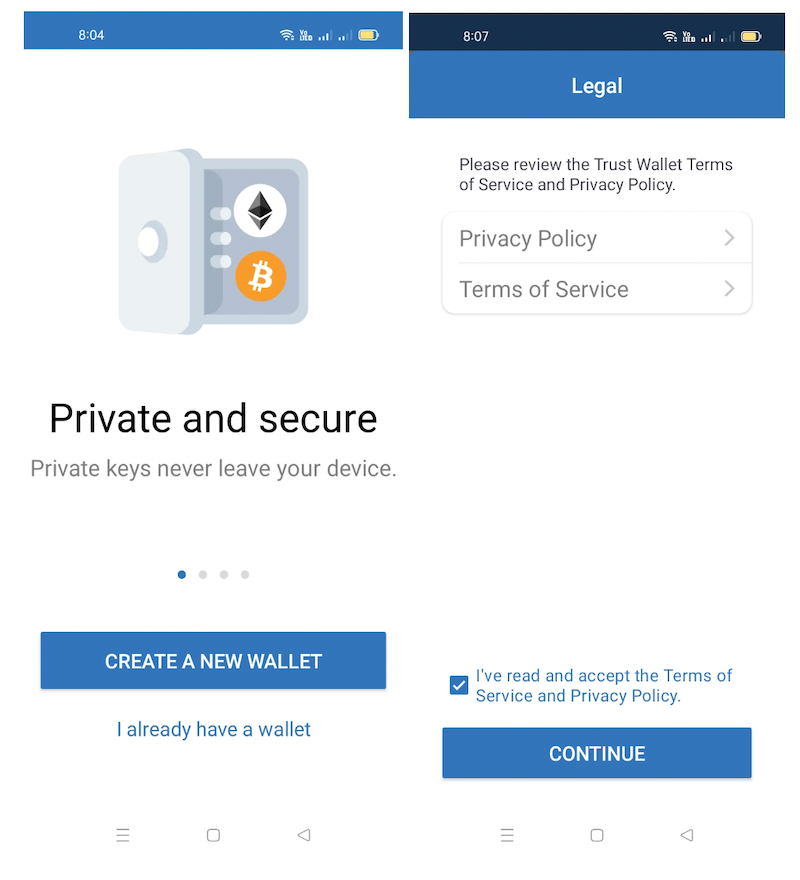
Next, accept the Terms of Service and Privacy Policy and click on ‘Continue.’
The next step will be to create a six-digit passcode which adds an extra layer of security for you when you are using the app. Once you key in and confirm your passcode, proceed to back up your wallet.
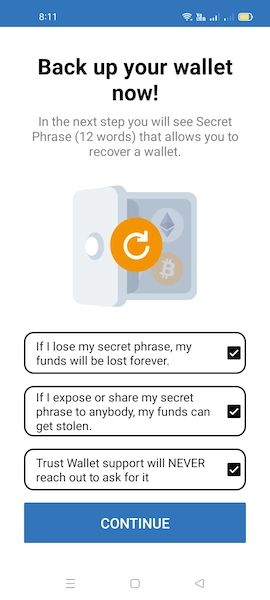
Backing up your seed phrase
To back up your Trust Wallet account, Trust Wallet will require you to note down a 12-word secret phrase that allows you to recover your wallet. In addition, you will need to accept the Trust Wallet guidelines as shown below, then click on ‘Continue.’
Next, note down the 12-word secret phrase in the exact order and click on ‘Continue’. Trust Wallet does this by asking you to verify your secret phrase by tapping and putting your secret phrase words next to each other in the correct order. Once done, click on ‘Done’.
Once you are done, you will have successfully created your Trust Wallet account and are set to begin your journey on the app.

Remember, storing your secret phrase securely is important. Losing your 12-word secret phrase means losing access to your account and funds.
There are various ways that you can store your Trust Wallet secret phrase. For starters, you can write it down on a piece of paper and keep it in a secure place or store it inside your Password Manager. Alternatively, you can also engrave your secret phrase on a metal sheet.
Now that you know how to download and create your Trust Wallet account, let’s take a look at how you can import a wallet on the app.
Importing a wallet
You can import a wallet to Trust Wallet from another wallet in four main ways. However, the initial process is the same.
For this guide, we will take a look at how you can import your Ethereum wallet using your recovery phrase and also through your Ethereum address.
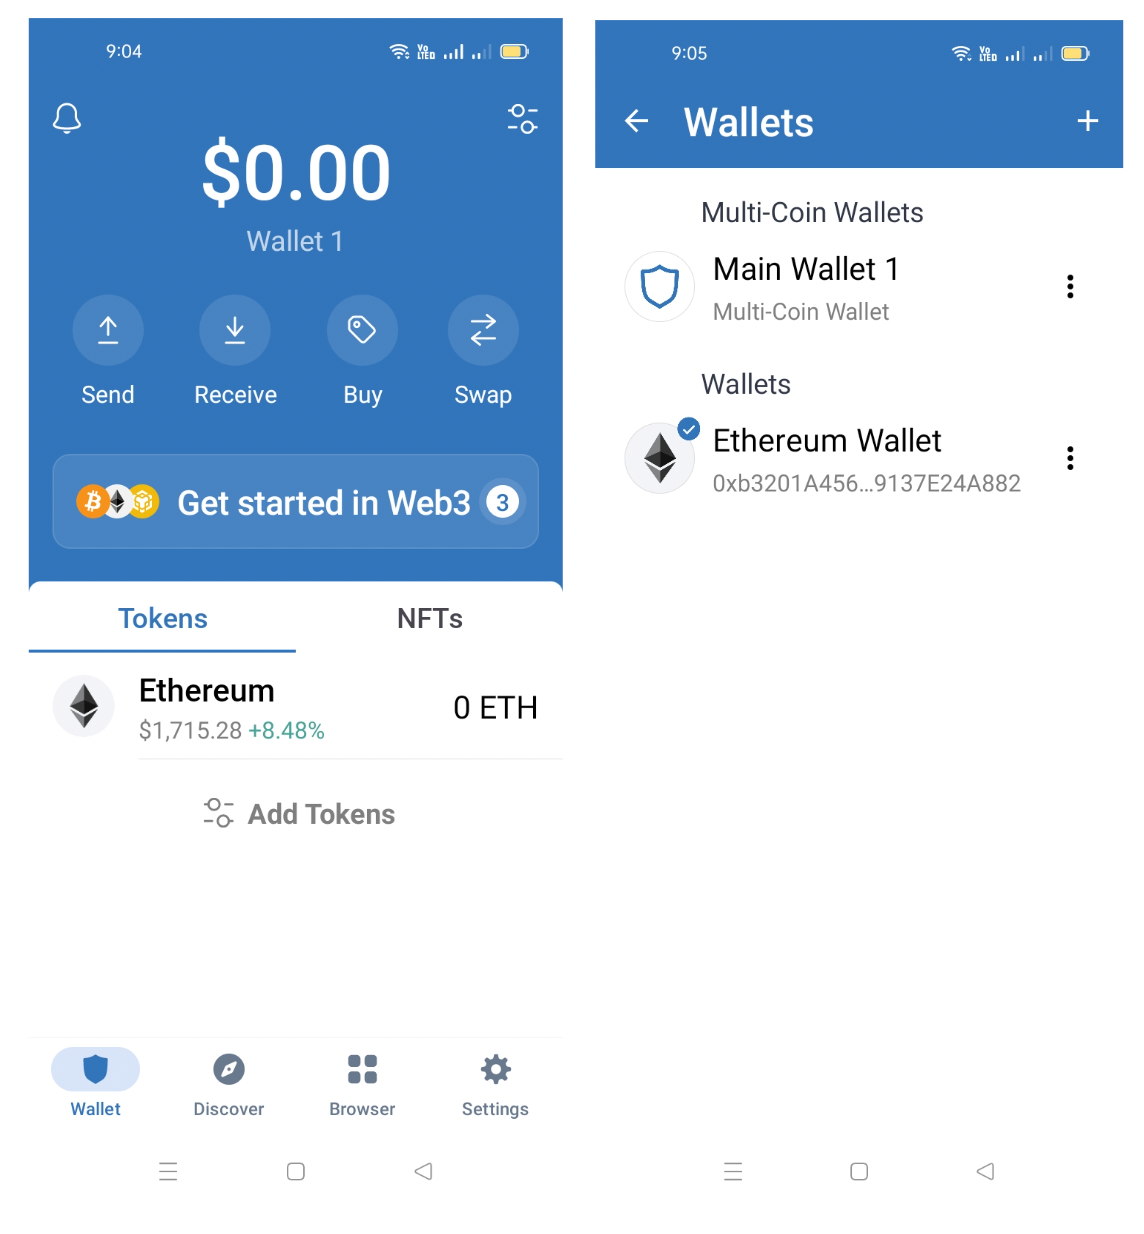
To import a wallet to Trust Wallet, click on ‘Settings’ then ‘Wallets’. Next, click on the add icon found in the top right-hand corner.

How to import a wallet using a recovery phrase
After clicking on settings, click on ’Add icon’ and choose the ‘I already have a wallet’ option and scroll or use the search bar to find Ethereum.
Proceed to key in your 12-word recovery phrase and click on ‘Import.’ Once successful, Trust Wallet will redirect you to your recently added Ethereum wallet. Alternatively, you can click on ‘Settings’ and then ‘Wallets’ to see your just-added Ethereum wallet.
How to import a wallet using the wallet address
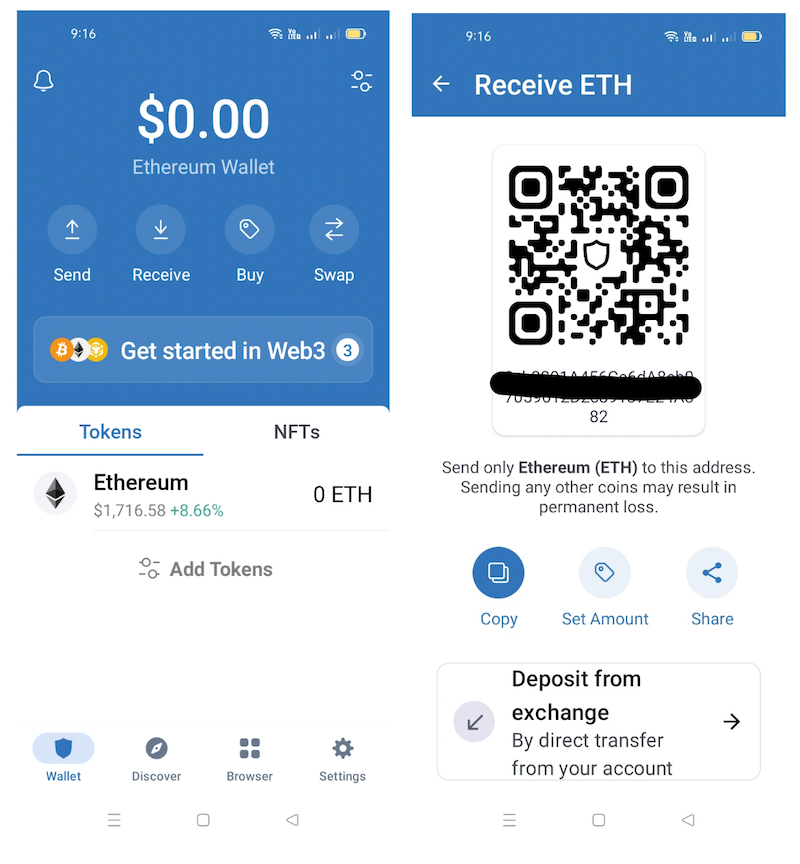
Next, let’s take a look at how to import your Ethereum wallet on Trust Wallet using your Ethereum wallet address.
First, go to the Trust Wallet app and click on ‘Wallet’ then ‘Receive’ under the Ethereum Wallet and then ‘Copy’ the wallet address.
Similar to the import option with recovery phrase, go to ‘Settings’ then ‘Wallets’ and click on the ‘Add’ icon, click on ‘I already have a wallet’ and search for Ethereum.
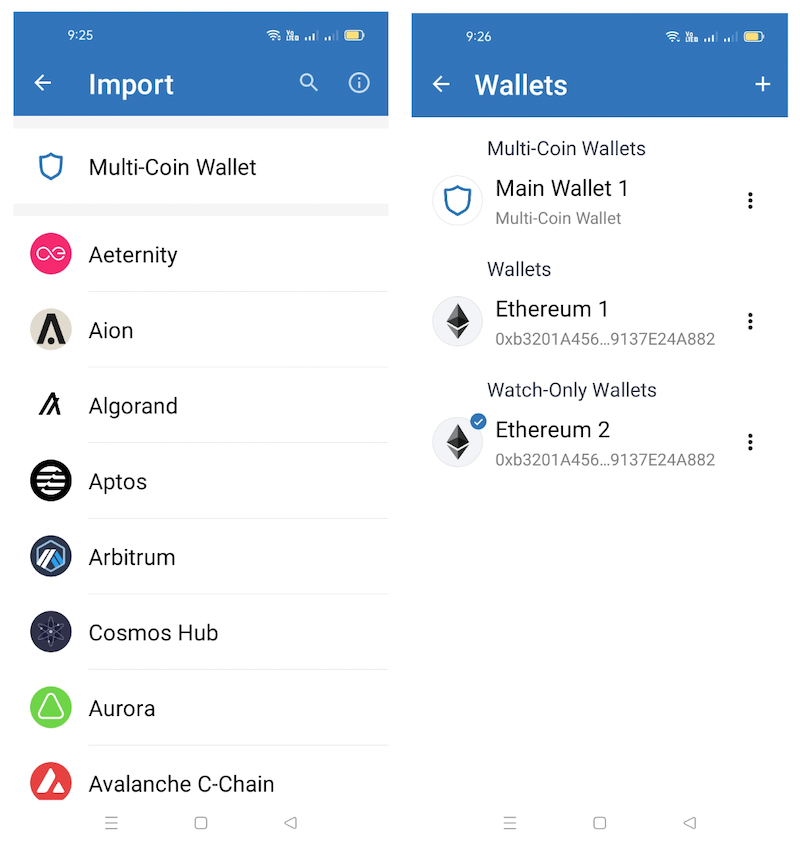
Next, choose the ‘Address’ option at the top and proceed to name the wallet and paste the Ethereum address, then click on ‘Import.’ Your wallet will then appear on the app. You can then confirm your just imported wallet by clicking on ‘Settings’ then ‘Wallets’ as shown below.
Additionally, you can also import other wallet addresses from other wallets such as MetaMask. You can read more on that in our explainer article on importing a Metamask wallet to Trust Wallet.
Main Wallet Features
Trust Wallet has multiple features that users can use to make the most out of the crypto wallet. Below, we will take a look at some of the key functions and features the app has.
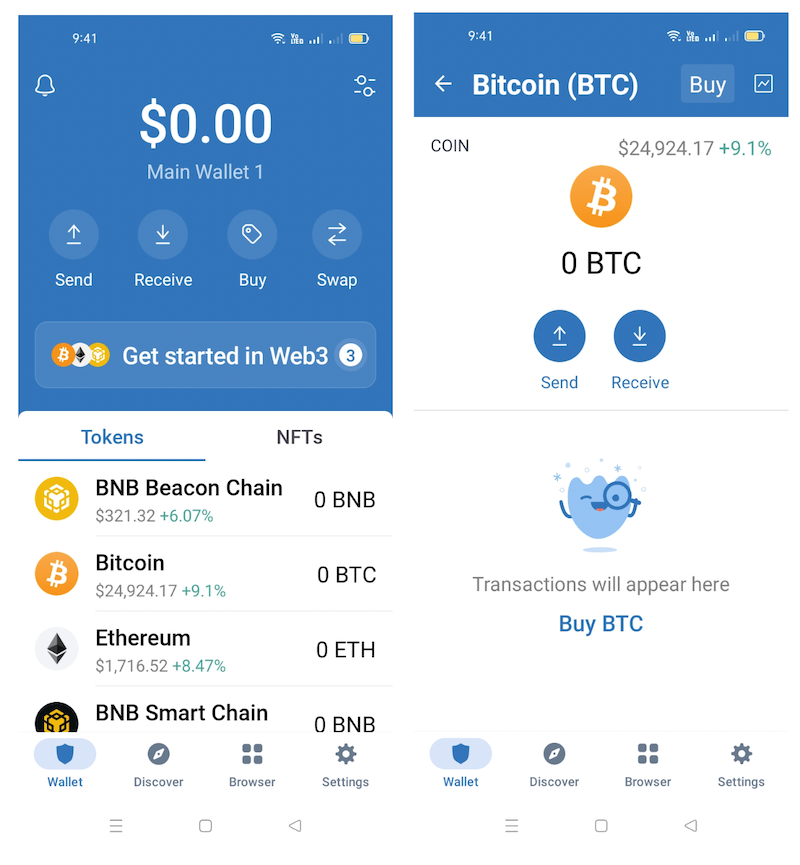
How to buy crypto with Trust Wallet
To buy Bitcoin using Trust Wallet, go to your Main Wallet and click on ‘Bitcoin’ and then on ‘Buy Bitcoin.’
Next, key in the amount of BTC you want to buy. It’s important to note that Trust Wallet does not sell crypto. Thus, all crypto purchases will be made via third-party providers. Once you key in the amount you want to spend, you will be redirected to MoonPay to complete your BTC purchase.
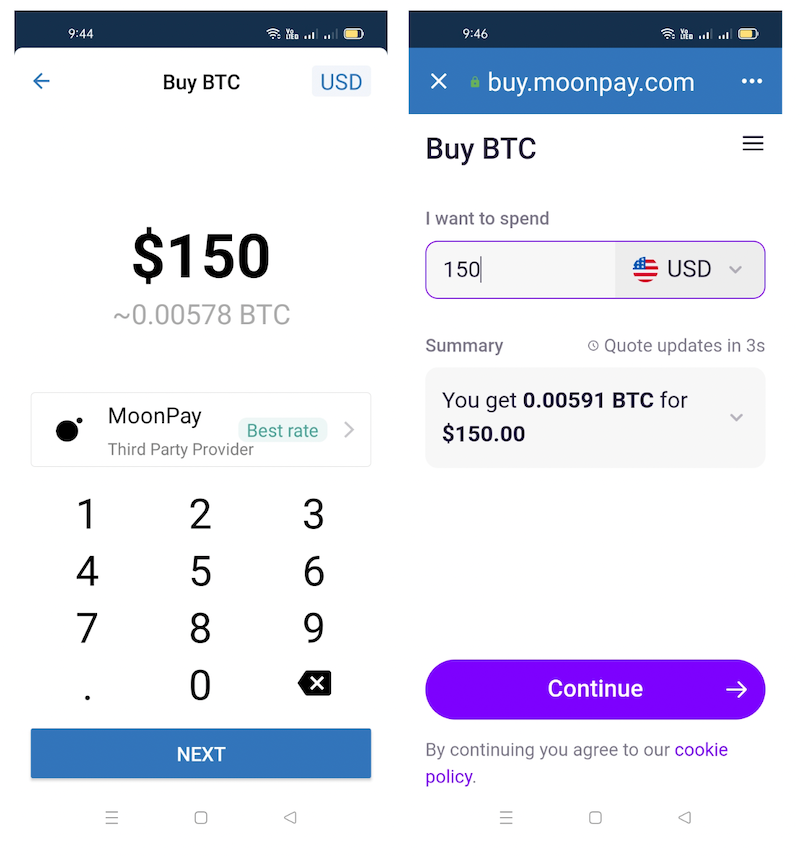
On MoonPay, you can choose the currency you’d like to make your BTC purchase in, and then you will be able to see the amount of Bitcoin you will get into your Trust Wallet once the transaction is successful.
Next, key in your email address and click on ‘Continue’. Trust Wallet will send you a six-digit code to your email address to verify it’s you.
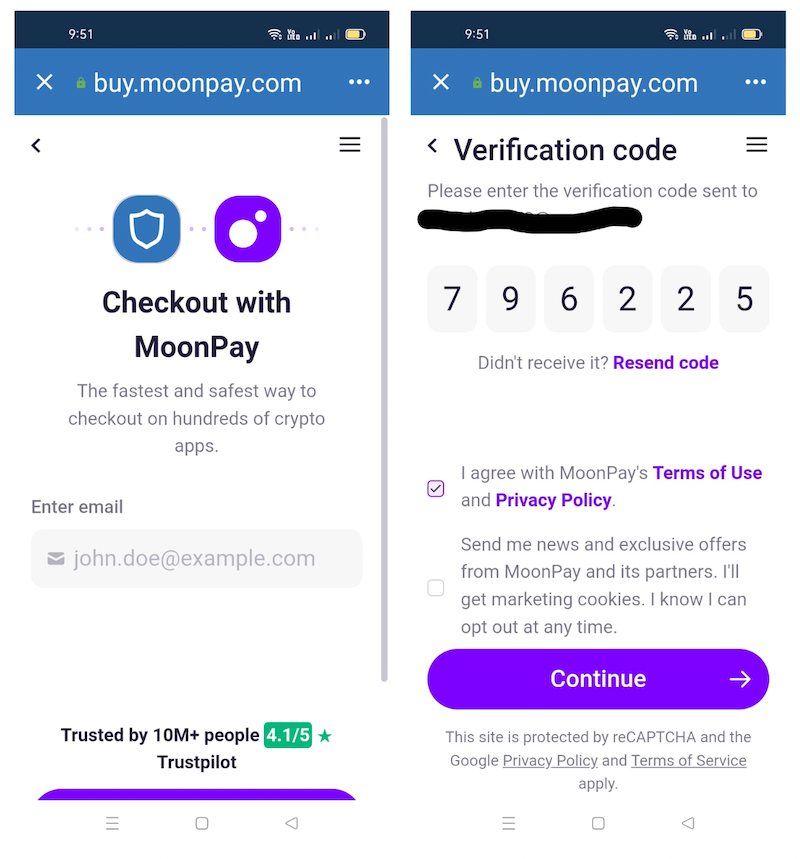
From there, you’ll enter your personal details like your name, date of birth, billing address, and debit card details. Once done, confirm the transaction. You will get a notification if your purchase has been successful, and the Bitcoin will be deposited into your Trust Wallet account as soon as possible.
Sending and receiving crypto & NFTs
You can send and receive different cryptocurrencies and NFTs using Trust Wallet.
To send and receive Bitcoin on Trust Wallet, go to the Main Wallet and click on ‘Bitcoin.’ Then, click on ‘Send.’ Next, enter the wallet address that you want to send BTC to and the amount, then click on ‘Continue’ at the top right-hand corner of your screen. Always ensure that you have enough Bitcoin in your wallet to also cover the transaction fee.
Proceed to confirm and complete the transaction. You will be able to see the transaction under your Bitcoin tab.
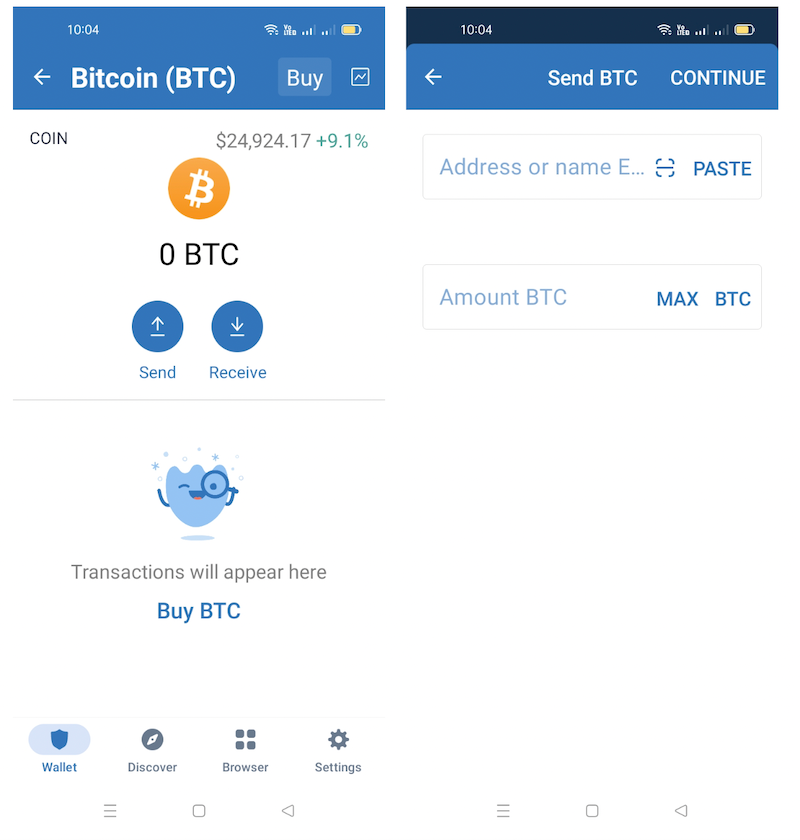
To receive Bitcoin, click on the ‘Receive’ option and copy your Bitcoin wallet address. Next, share the wallet address with the person sending you the BTC. Once they can successfully process the transaction, you will get a notification from Trust Wallet, and the transaction will be recorded under your Bitcoin tab.

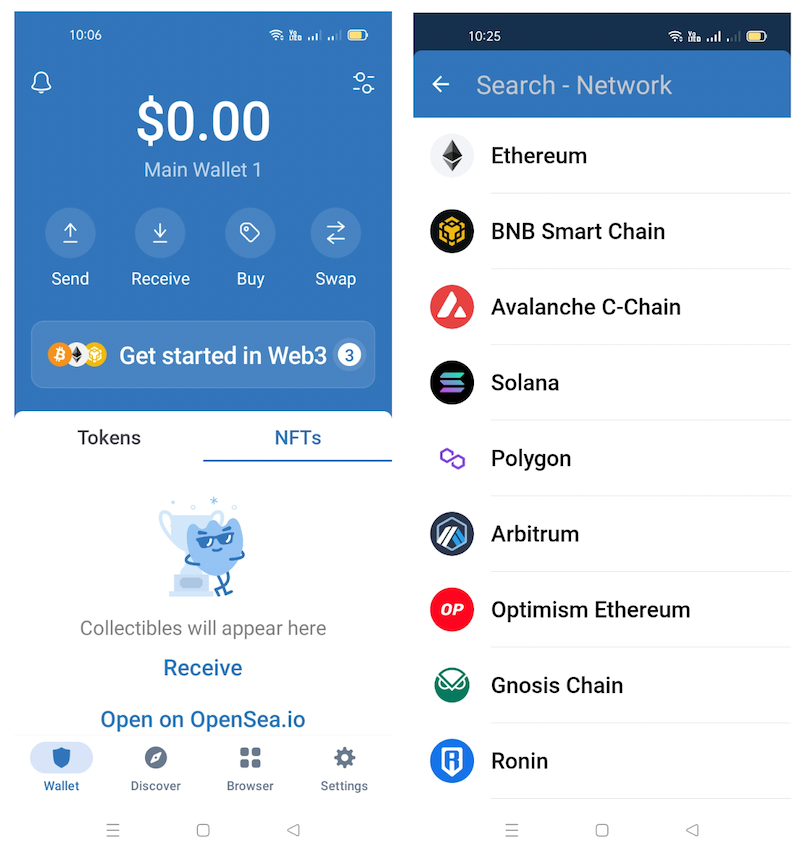
Sending and receiving NFTs using Trust Wallet is similar to sending and receiving cryptocurrencies. However, for NFTs, you will need to choose the network that you want to receive the NFT through.
To receive an NFT, click on the NFT option and then click on ‘Receive.’ Next, choose the Ethereum network and proceed to copy the wallet address and share it with the person who wants to send you the NFT.
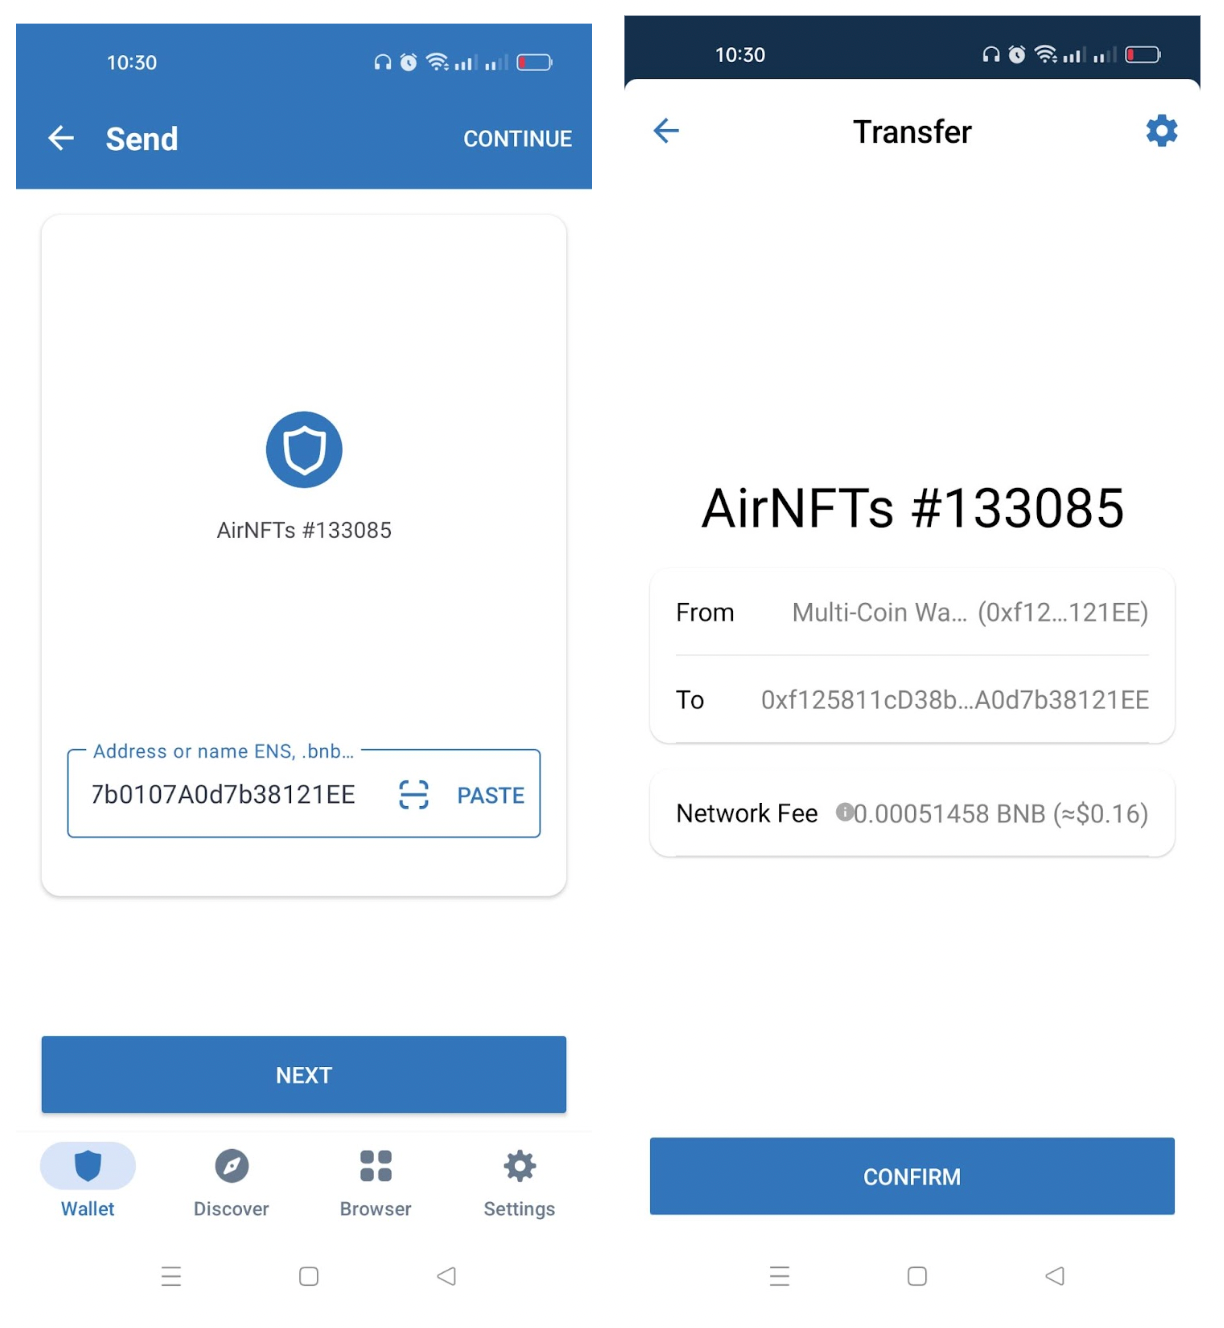
Before you can send an NFT, you must have an NFT as part of your collection. Select the NFT you want to send and then click on ‘Send’.

Next, paste the wallet address that you want to send the NFT to and confirm the transfer. The NFT will be deposited under your NFT tab in your Trust Wallet.
Securely store assets in one place
Trust Wallet allows users to store and manage more than 9 million crypto assets, including NFTs, across 70 blockchains. As a multi-coin wallet, you can securely store all your assets under one roof.
However, to ensure the safety of your assets, ensure that you never share your secret phrase and always back up your recovery phrase.
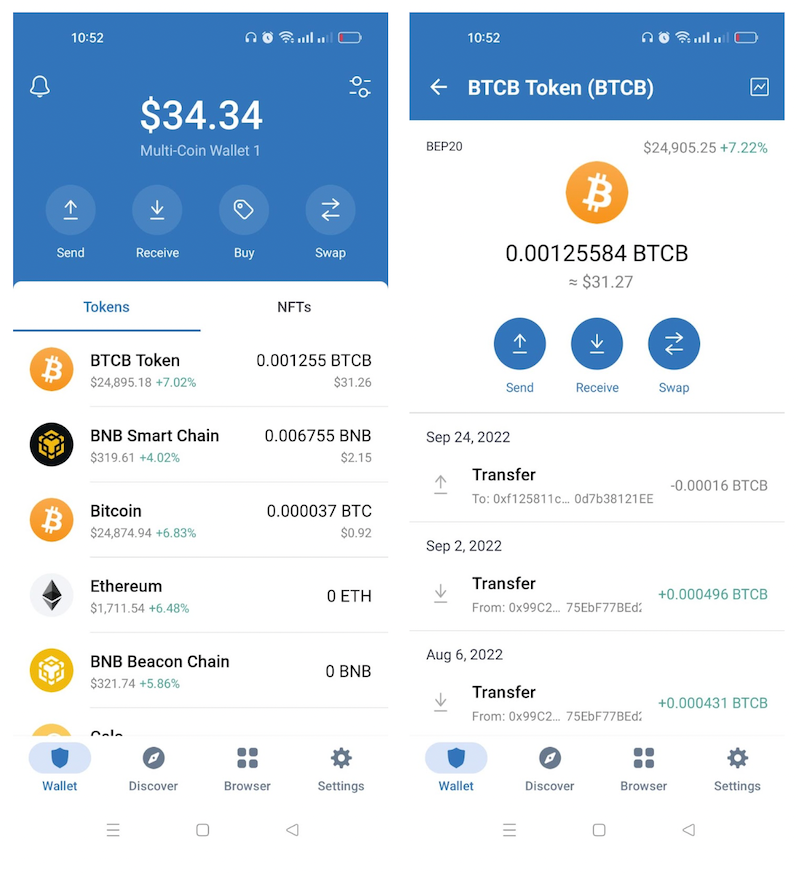
How to check your balance and transaction history
To explain how to check your balance and transaction history, we will use the BTCB Token.
Open your Trust Wallet app, navigate to the token section, and select the BTCB token. A list of all the BTCB transactions you have had will appear below the token and the BTCB balance you have.
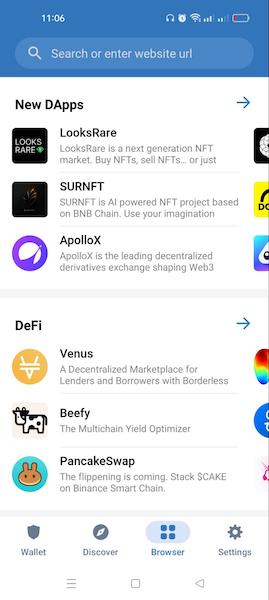
Connect to dApps
As a Trust Wallet user, you can easily connect to your favorite dApp browsers. Iit’s as easy as going to your Trust Wallet app and clicking on the dApp browser at the bottom.
To use dApps that do not natively support Trust Wallet, you’ll have to connect to the dApp using WalletConnect.
WalletConnect is an open-source protocol that enables you to connect decentralized applications to mobile crypto wallets, such as Trust Wallet, using deep linking or QR code scanning. This makes it easy for you to secretly transact on Trust Wallet without revealing their personal information.
Below is a step-by-step guide on how iOS users can access dApps on Trust Wallet using WalletConnect. In this guide, we will use PancakeSwap to demonstrate. PancakeSwap is a decentralized platform that enables you to earn, trade, and win cryptocurrencies.
To connect to dApps on Trust Wallet using WalletConnect on your smartphone, go to the official website of PancakeSwap - https://pancakeswap.finance. Always ensure that you visit the official website of the dApp you want to use. Then, click on ‘Connect’ and choose ‘Trust Wallet’.
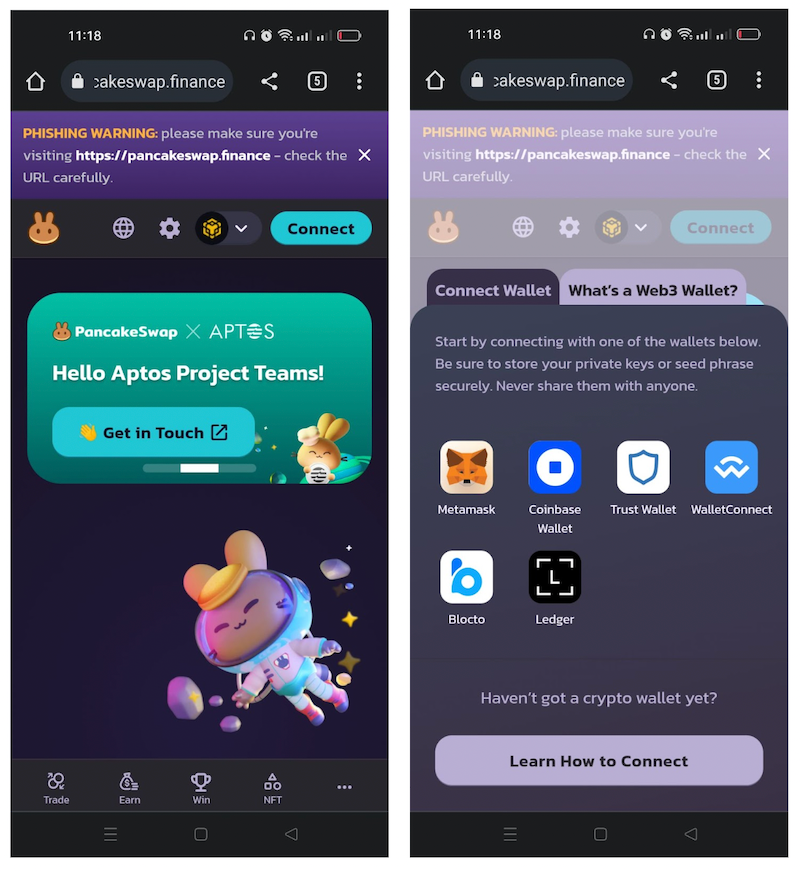
Next, allow the PancakeSwap dApp to connect to Trust Wallet.
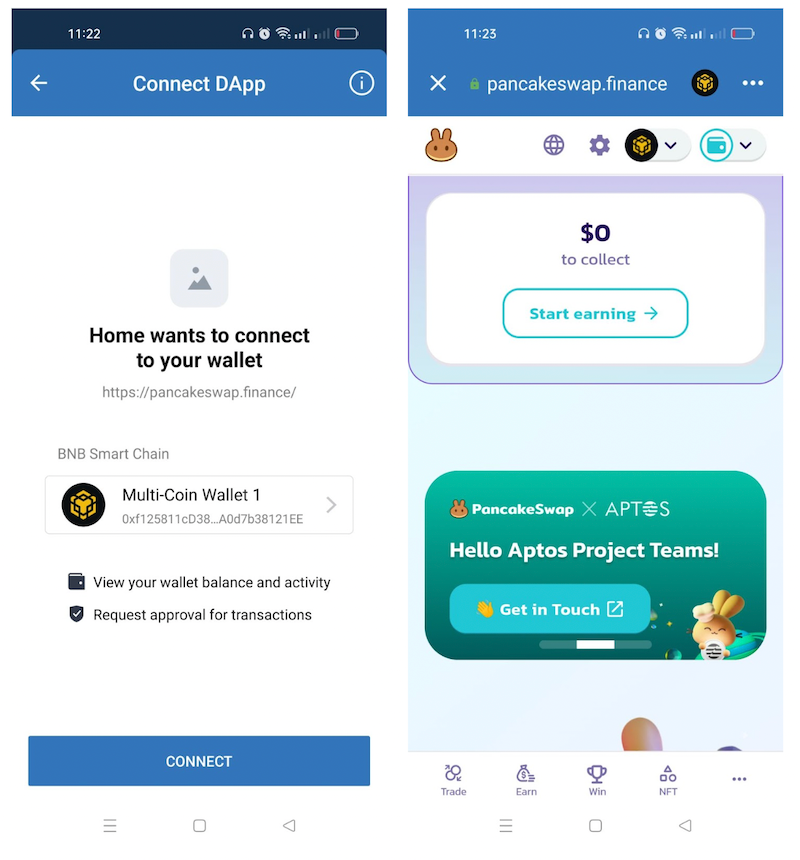
And that’s it! That’s how to connect to dApps using Trust Wallet and WalletConnect. Always remember to disconnect your wallet once you are done carrying out your transactions.
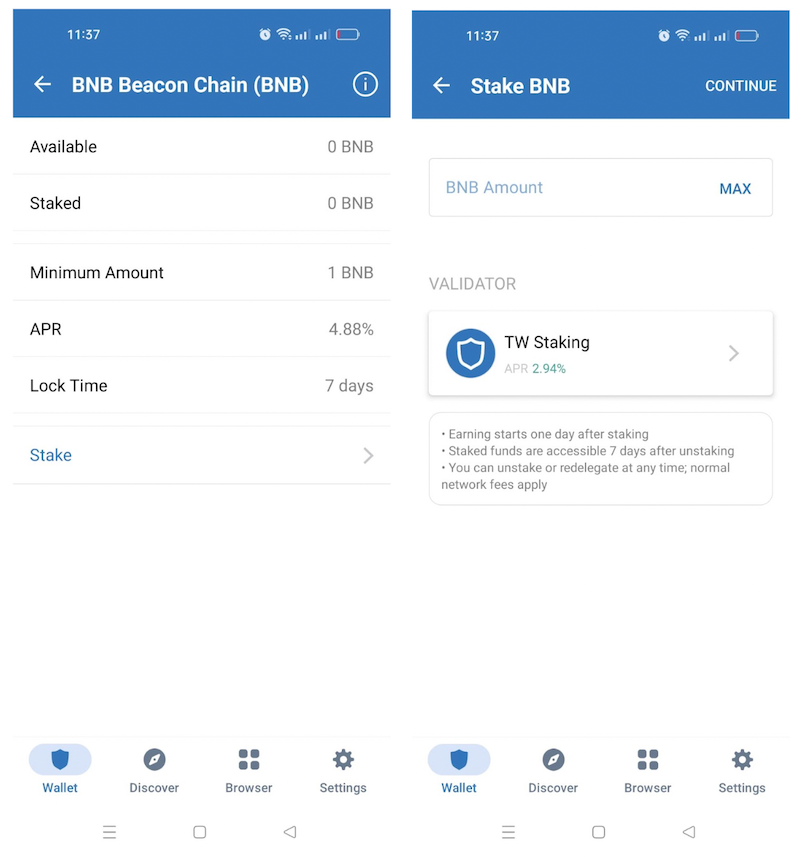
Stake crypto and earn interest
With Trust Wallet, you can stake your crypto directly in the app and earn interest with a few clicks. All you need to do is to go on the Trust Wallet app and click on ‘Discover.’
Then, select the token you want to stake. For this guide, we will use BNB as an example.
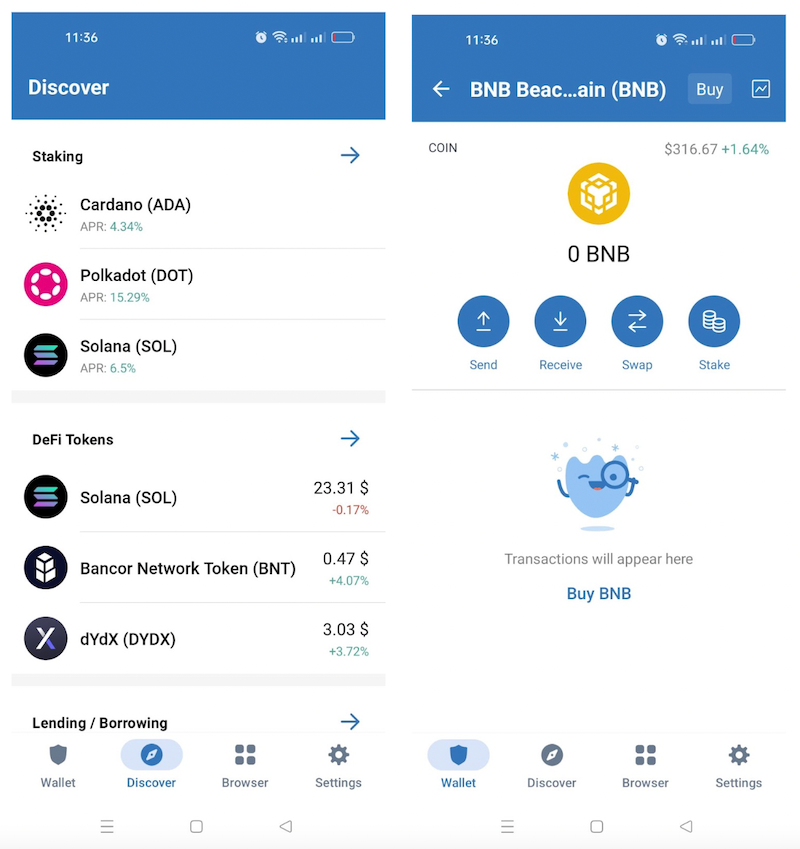
Next, proceed to ‘Buy BNB’ by following the Trust Wallet prompts. Once your BNB tokens have been deposited to your account, enter the amount of BNB you want to stake and click on ‘Continue’ to complete the transaction and start staking.
Swap Coins and Tokens
Swapping coins and tokens using Trust Wallet is easy. Besides, Trust Wallet also supports in-app cross-chain swaps via the THORChain.
Moreover, with this integration, Trust Wallet doesn’t charge any service fee for executing the cross-chain swaps. This means that you can now swap different coins or tokens on other blockchains.
Below is how to swap BTC for ETH. Keep in mind that you can also swap BNB (BEP2) and BUSD (BEP2). However, for this guide, we will swap BTC for ETH.
Go to your Main Wallet on Trust Wallet and click on ‘Swap.’
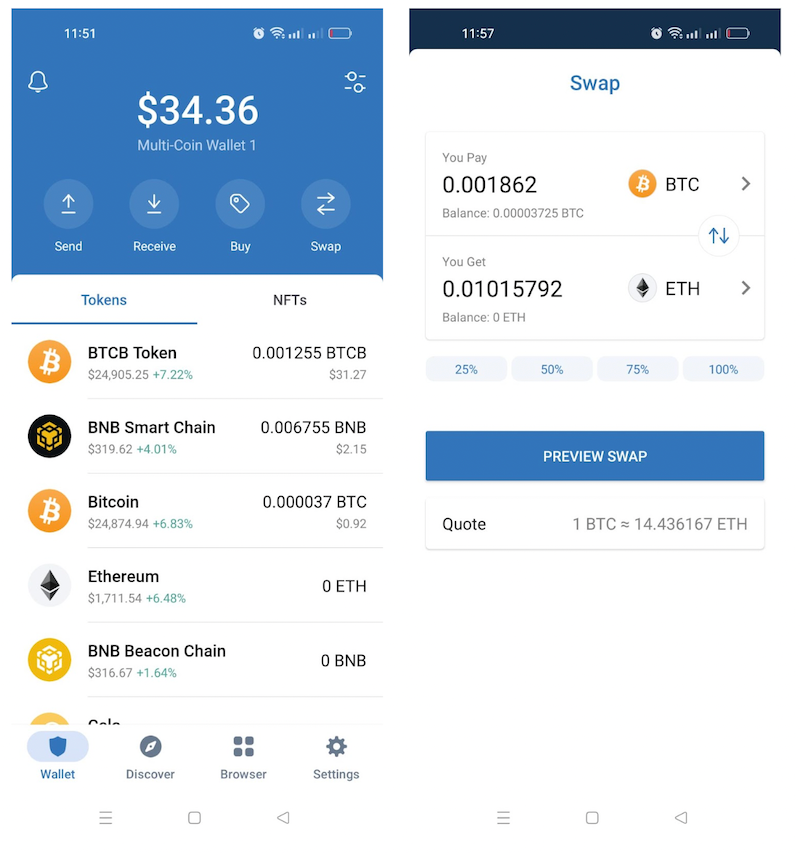
Next, click on ‘Preview Swap’ and proceed to confirm the transaction details by clicking on ‘Confirm Swap.’
That’s how you can swap coins and tokens on Trust Wallet.
TWT (Trust Wallet Token)
The Trust Wallet Token (TWT) is a native token for Trust Wallet. TWT holders are able to vote on governance decisions on Trust Wallet, such as what kind of blockchain support can be added to shape the platform’s future, discounts, payments, and much more.
The Trust Wallet Token is available on BNB Beacon Chain as a BEP2 token, on BNB Smart Chain as a BEP20 token, and on Solana as an SPL token.
Safety and Security
Security is at the core of what we do at Trust Wallet. With the trust of over 60 million people worldwide, Trust Wallet takes a proactive approach to security that keeps its people’s digital assets safe and in their control by giving them ownership of their private keys.
In addition, Trust Wallet takes a multi-faceted approach to security by utilizing industry-leading encryption in all its products. This also includes in-app one-to-one communication with users when needed.
Importance of protecting your seed phrase
Your secret phrase is the master key to your wallet, and anyone that has it can access all your crypto. Your seed phrase should be known by you and you only. Since Trust Wallet is also a non-custodial wallet, we don’t own your wallet’s private keys, and in the event that you lose them, you will have lost access to your account and funds.
Trust Wallet security scanner
To further enhance its security, Trust Wallet has an inbuilt Security Scanner that helps detect any potential risks when you carry out any crypto transaction within the wallet. As a result, you can enjoy a safe and seamless crypto and Web3 experience while using Trust Wallet because all transactions are assigned a risk level. This way, you can make more informed decisions when carrying out transactions.
Best practices for keeping your funds secure
Keeping your funds safe starts with you. That said, there are several best practices that you can incorporate to keep your funds secure.
Firstly, ensure that you securely store your recovery phrase. Secondly, always back up your Trust Wallet. Thirdly, do not share your seed phrase with anyone. Last but not least, ensure that you only interact with the real Trust Wallet app and avoid downloading any malicious links or phishing emails.
Troubleshooting and Support
Unfortunately, many crypto applications and platforms don’t have real customer support teams. However, that’s not the case with Trust Wallet. Besides having a responsive customer support team, Trust Wallet also has various community resources for help and support that you can plug into.
Common issues and how to resolve them
Trust Wallet has a dedicated troubleshooting page that allows users to fix any issues by themselves first. This, however, does not mean that you cannot ask for help from the support team in the event you are unable to resolve the issue you have with the app or platform.
Contacting the Trust Wallet Support Team
Trust Wallet has an easy-to-access support team of real people who are always ready and willing to help. Trust Wallet’s team works around the clock to ensure that our community is well taken care of in case they have any issues.
Community resources for help and support
There are multiple ways that Trust Wallet users can get help and support. If you want any kind of support from Trust Wallet, feel free to head on over to community.trustwallet.com or reach out to the team via Telegram or Twitter.